Camera Authentication Towards Signaling Service
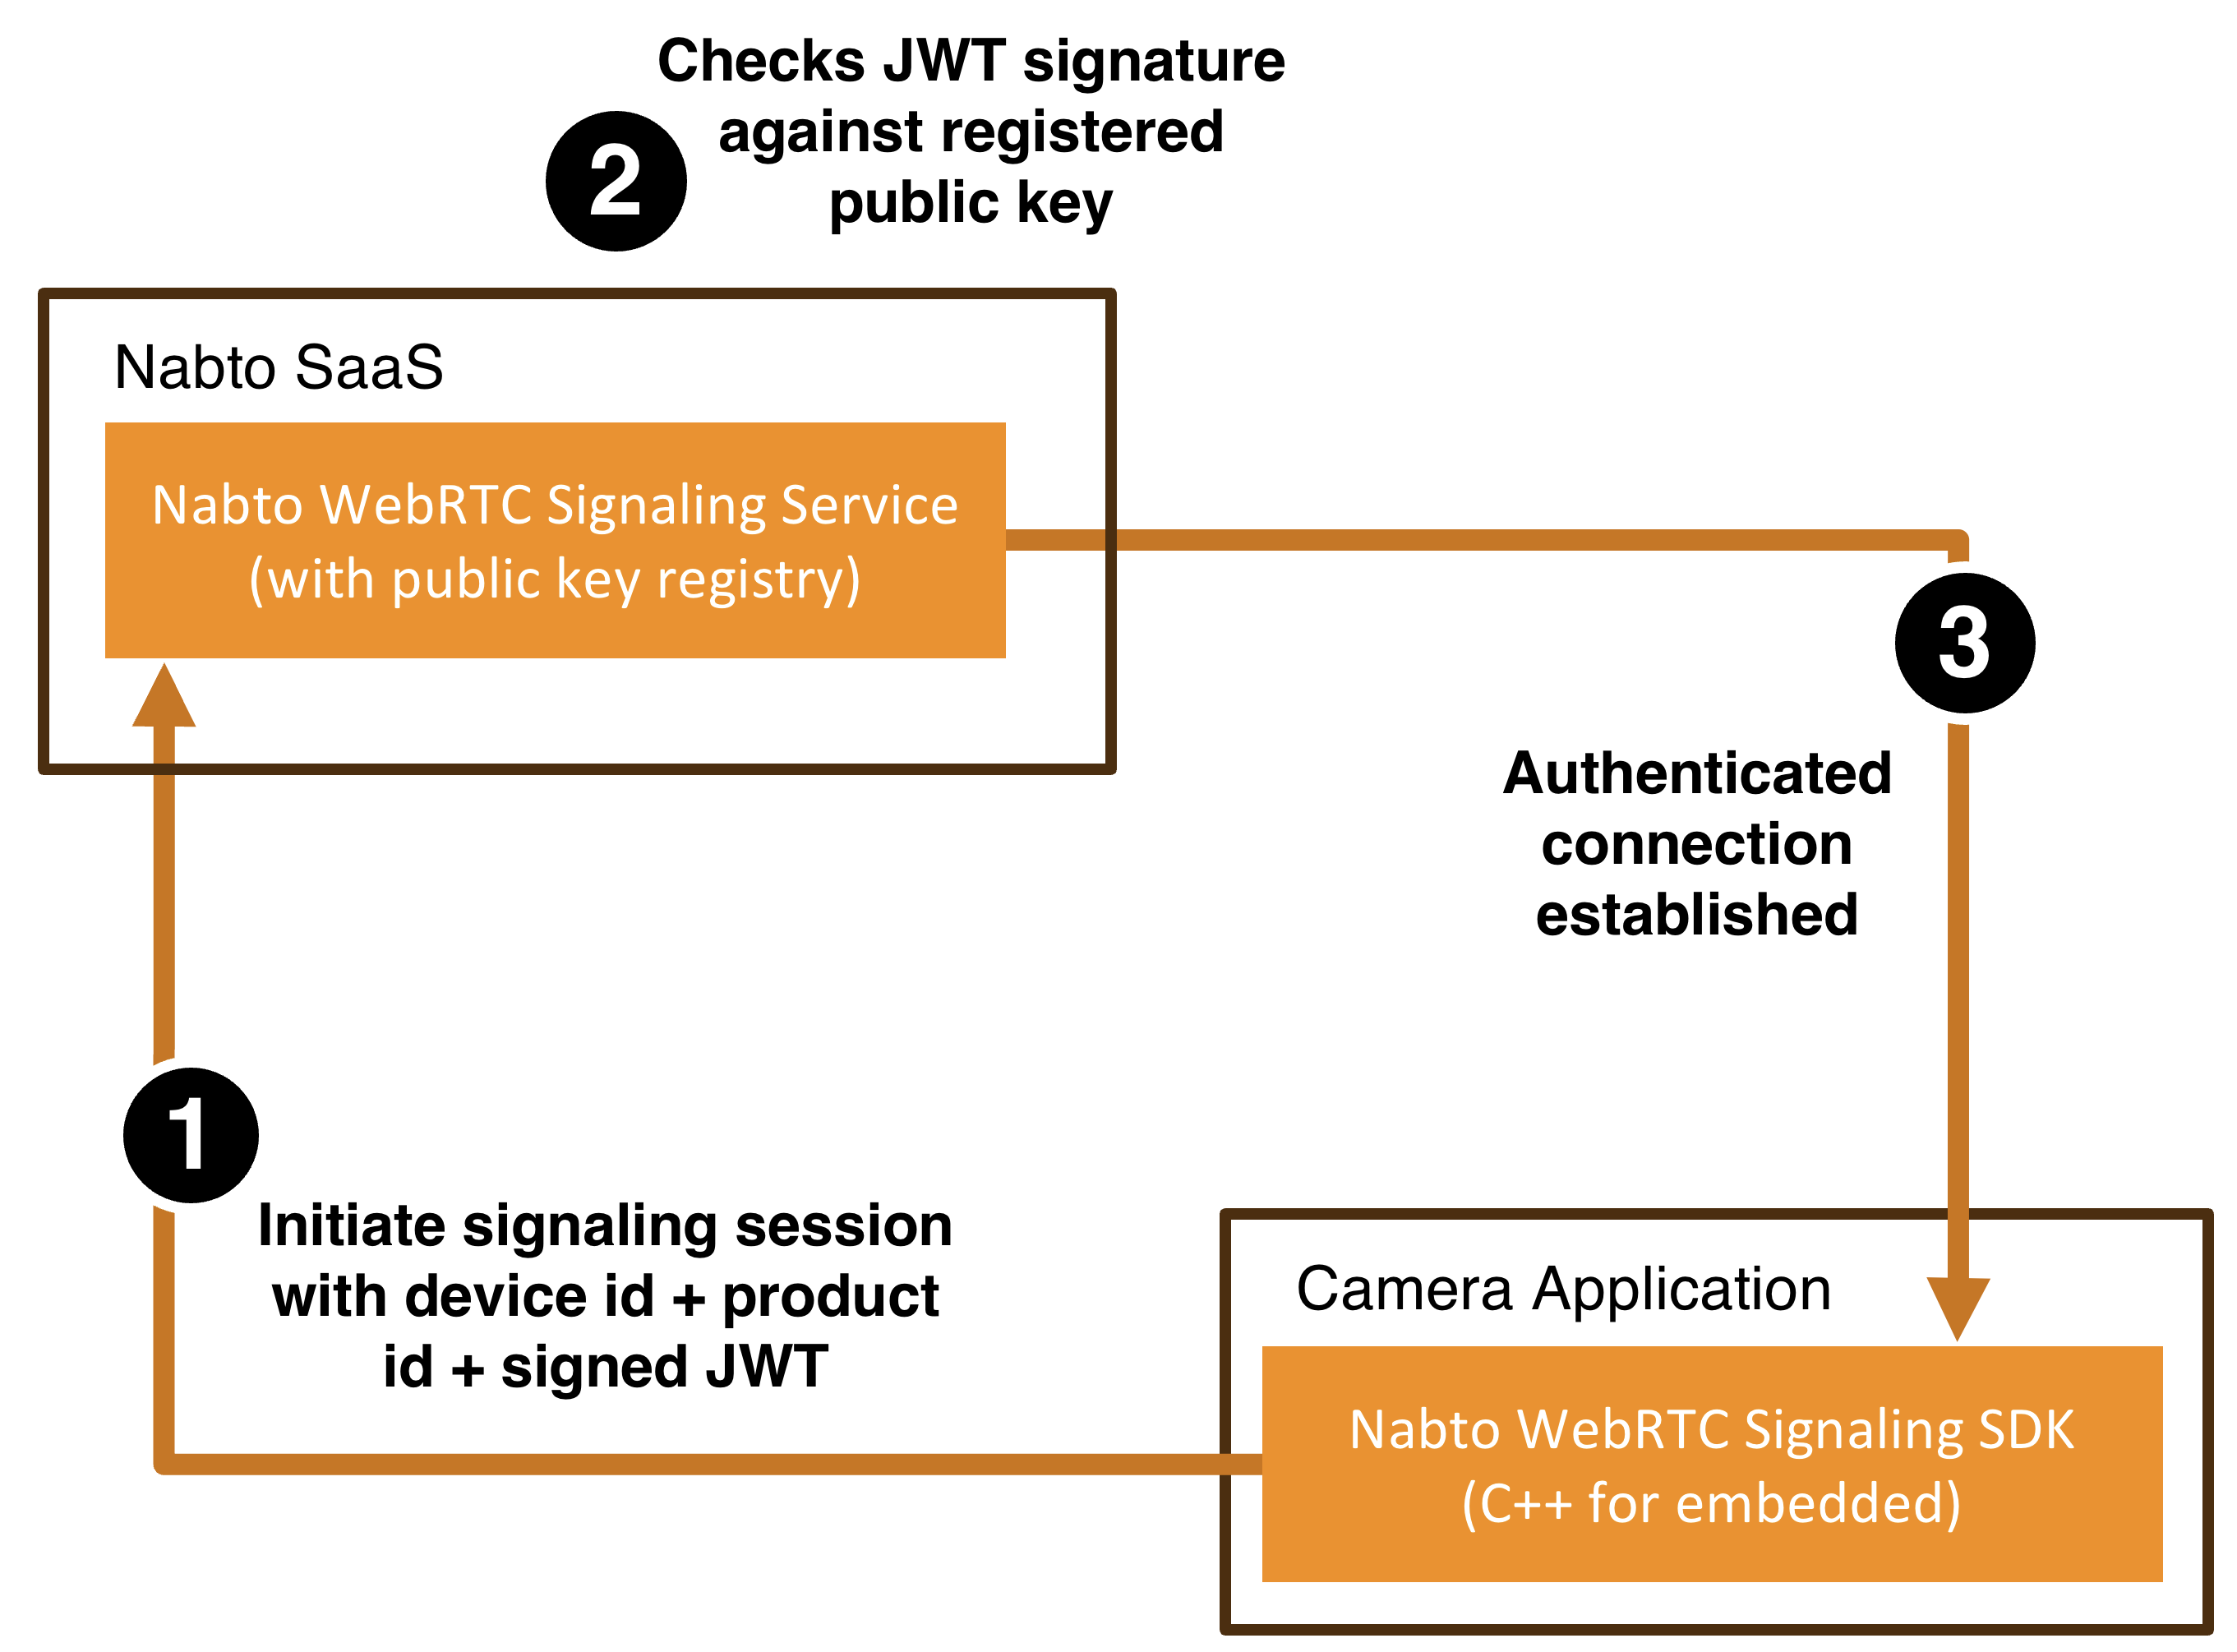
When a device (camera) connects to the signaling service, it initiates the handshake by including its identity (product ID + device ID). The signaling service then verifies the device’s authenticity using signed tokens: The device includes an authorization header containing a JWT that embeds its identity and is signed using its private key. The signaling service validates this token by checking the signature against the registered public key for the device.
This process guarantees that only the legitimate device possessing the private key can establish a signaling session. It prevents device spoofing and ensures that all subsequent signaling traffic originates from a verified device.
This process is all implemented by the Nabto WebRTC SDKs, the vendor’s only responsibility is to provide input data and register keys with the Nabto WebRTC Signaling service as outlined below.
Creating and Registering Key Pair
Each device must be provisioned with a unique key pair based on elliptic curve cryptography. Specifically, the NIST P-256 elliptic curve, also known as secp256r1 must be used, which is widely supported and provides an appropriate balance of security and performance for IoT applications.
The application must be configured with the following keys:
- Private Key: This key remains securely stored on the device and must never be shared. It is used for JWT signing as described in the previous section.
- Public Key: This key is distributed to the backend during device provisioning and is used by the signaling service to validate JWT signatures as described in the previous section.
Generating a key pair using the Nabto Cloud Console
For development and test, private keys can conveniently be generated through the Nabto Cloud Console. The public key is then registered in the same operation in the backend.
For production, you should never generate the private key through the console: As mentioned in the previous section, the private key must never be shared outside the device (camera). So while convenient, only create private keys through the console if doing it for test and development.
The tutorials describe how to use the Nabto Cloud Console to create such private key for test and development.
Generating a key pair with OpenSSL
For production, you can use an offline tool like OpenSSL to generate keys instead:
openssl ecparam -name secp256r1 -genkey -noout -out key.pem
openssl ec -in key.pem -pubout -out key.pub
This will result in two files:
key.pem: Contains the private key in PEM format. This file must be securely installed on the device.key.pub: Contains the corresponding public key. The contents of this file are registered with the Nabto Signaling Service backend.
Registering public key with the Nabto WebRTC Signaling service
The device’s public key must be registered with the Nabto WebRTC Signaling service. This can happen through the Nabto Cloud Console, simple and useful for development and test. If generating a private key through the console (only for development and test), the public key is automatically registered.
For mass production, you can bulk upload public keys also through the Nabto Cloud Console. Or you can use the Nabto Cloud API for tight integration with your existing manufacturing process.
Implementation of Device Authentication
Nabto’s SDK handles all the complexities of device authentication through JWT signing using the private key.
The only responsibility of the device application is to provide its product ID, device ID and private key to the SDK’s authentication components. From there, the SDK generates the required JWT tokens and manages the authentication flow transparently.
In practice, this means your application does not need to manually implement signing logic or deal with low-level cryptographic operations. The following show how a device integrates with the Nabto WebRTC SDK to authenticate itself towards the signaling service:
import { createSignalingDevice, DeviceTokenGenerator } from '@nabto/signaling';

const deviceSettings = {
  productId: 'myProductId',                    // obtained through the Nabto Cloud Console
  deviceId: 'myDeviceId',                      // obtained through the Nabto Cloud Console
  privateKey: 'PEM-encoded-private-key'        // generated by you
};

// Initialize the token generator using the device's identity and private key
const tokenGenerator = new DeviceTokenGenerator(
  deviceSettings.productId,
  deviceSettings.deviceId,
  deviceSettings.privateKey
);

// Create the signaling device
const signalingDevice = createSignalingDevice({
  productId: deviceSettings.productId,
  deviceId: deviceSettings.deviceId,
  tokenGenerator: async () => {
    return tokenGenerator.generateToken()
  }
});

signalingDevice.onNewSignalingChannel = (channel, authorized) => {
  handleNewChannel(channel, authorized);
}

// Connect to the signaling service with automatic token generation
signalingDevice.start();
void connect() {
  std::string productId =
      "myProductId"; // obtained through the Nabto Cloud Console
  std::string deviceId =
      "myDeviceId"; // obtained through the Nabto Cloud Console
  std::string privateKey = "PEM-encoded-private-key"; // generated by you

  nabto::webrtc::SignalingTokenGeneratorPtr jwtPtr =
      nabto::webrtc::util::NabtoTokenGenerator::create(productId, deviceId,
                                                       privateKey);

  auto http = nabto::webrtc::util::CurlHttpClient::create();
  auto ws = nabto::example::RtcWebsocketWrapper::create();
  auto tf = nabto::webrtc::util::StdTimerFactory::create();
  auto trackHandler = nabto::example::H264TrackHandler::create(nullptr);

  nabto::webrtc::SignalingDeviceConfig conf = {deviceId, productId, jwtPtr, "", ws, http, tf};

  auto device = nabto::webrtc::SignalingDeviceFactory::create(conf);
  device->addNewChannelListener(
      [device, trackHandler](nabto::webrtc::SignalingChannelPtr channel, bool authorized) {
        handleNewChannel(device, channel, authorized, trackhandler);
      });
  device->start();
}